|
HCE Project DC service web UI
0.2
Hierarchical Cluster Engine DC service web UI
|
|
HCE Project DC service web UI
0.2
Hierarchical Cluster Engine DC service web UI
|

Originally written by Stefan Petre
Read the documentation here
Thanks =)

This is a fork of Stefan Petre's original code; thanks go to him for getting this thing started!
Please note that this fork is not used on Stefan's page, nor is it maintained or contributed to by him.
Versions are incremented according to semver.

This project is a fork of bootstrap-datepicker project.
As 'bootstrap-datetimepicker' is restricted to the date scope (day, month, year), this project aims to support too the time picking (hour, minutes).

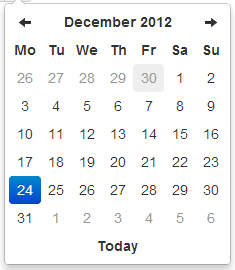
This view allows to select the day in the selected month.

This view allows to select the month in the selected year.
This view allows to select the year in a range of 10 years.

This view allows to select the hour in the selected day.

This view allows to select the preset of minutes in the selected hour. The range of 5 minutes (by default) has been selected to restrict buttons quantity to an acceptable value, but it can be overrided by the minuteStep property.

Meridian is supported in both the day and hour views. To use it, just enable the showMeridian property.

Attached to a field with the format specified via options:
```html <input type="text" value="2012-05-15 21:05" id="datetimepicker"> javascript $('#datetimepicker').datetimepicker({ format: 'yyyy-mm-dd hh:ii' }); ```
Attached to a field with the format specified via markup:
```html <input type="text" value="2012-05-15 21:05" id="datetimepicker" data-date-format="yyyy-mm-dd hh:ii"> javascript $('#datetimepicker').datetimepicker(); ```
As component:
```html <div class="input-append date" id="datetimepicker" data-date="12-02-2012" data-date-format="dd-mm-yyyy"> <input size="16" type="text" value="12-02-2012" readonly>=""> javascript $('#datetimepicker').datetimepicker(); ```
As inline datetimepicker:
```html
javascript $('#datetimepicker').datetimepicker(); ```
Call the datetimepicker via javascript:
```javascript $('.datetimepicker').datetimepicker() ```
Requires bootstrap's dropdown component (dropdowns.less) for some styles, and bootstrap's sprites (sprites.less and associated images) for arrows.
A standalone .css file (including necessary dropdown styles and alternative, text-based arrows) can be generated by running build/build_standalone.less through the lessc compiler:
```bash $ lessc build/build_standalone.less datetimepicker.css ```
All options that take a "Date" can handle a Date object; a String formatted according to the given format; or a timedelta relative to today, eg '-1d', '+6m +1y', etc, where valid units are 'd' (day), 'w' (week), 'm' (month), and 'y' (year).
You can also specify an ISO-8601 valid datetime, despite of the given format :
String. Default: 'mm/dd/yyyy'
The date format, combination of p, P, h, hh, i, ii, s, ss, d, dd, m, mm, M, MM, yy, yyyy.
Integer. Default: 0
Day of the week start. 0 (Sunday) to 6 (Saturday)
Date. Default: Beginning of time
The earliest date that may be selected; all earlier dates will be disabled.
Date. Default: End of time
The latest date that may be selected; all later dates will be disabled.
String, Array. Default: '', []
Days of the week that should be disabled. Values are 0 (Sunday) to 6 (Saturday). Multiple values should be comma-separated. Example: disable weekends: '0,6' or [0,6].
Boolean. Default: false
Whether or not to close the datetimepicker immediately when a date is selected.
Number, String. Default: 2, 'month'
The view that the datetimepicker should show when it is opened. Accepts values of :
Number, String. Default: 0, 'hour'
The lowest view that the datetimepicker should show.
Number, String. Default: 4, 'decade'
The highest view that the datetimepicker should show.
Boolean, "linked". Default: false
If true or "linked", displays a "Today" button at the bottom of the datetimepicker to select the current date. If true, the "Today" button will only move the current date into view; if "linked", the current date will also be selected.
Boolean. Default: false
If true, highlights the current date.
Boolean. Default: true
Whether or not to allow date navigation by arrow keys.
String. Default: 'en'
The two-letter code of the language to use for month and day names. These will also be used as the input's value (and subsequently sent to the server in the case of form submissions). Currently ships with English ('en'), German ('de'), Brazilian ('br'), and Spanish ('es') translations, but others can be added (see I18N below). If an unknown language code is given, English will be used.
Boolean. Default: true
Whether or not to force parsing of the input value when the picker is closed. That is, when an invalid date is left in the input field by the user, the picker will forcibly parse that value, and set the input's value to the new, valid date, conforming to the given format.
Number. Default: 5
The increment used to build the hour view. A button is created for each minuteStep minutes.
String. Default: 'default'
The referer element to place the picker for the component implementation. If you want to place the picker just under the input field, just specify input.
String. Default: 'bottom-right' (supported values are: 'bottom-right', 'bottom-left', 'top-right', 'top-left')
This option allows to place the picker just under the input field for the component implementation instead of the default position which is at the bottom right of the button.
Number or String. Default: same as minView (supported values are: 'decade', 'year', 'month', 'day', 'hour')
With this option you can select the view from which the date will be selected. By default it's the last one, however you can choose the first one, so at each click the date will be updated.
Boolean. Default: false
This option will enable meridian views for day and hour views.
Date or String. Default: new Date()
You can initialize the viewer with a date. By default it's now, so you can specify yesterday or today at midnight ...
This event is fired when a day is rendered inside the datepicker. Should return a string. Return 'disabled' to disable the day from being selected.
```javascript $('date-end') .datetimepicker({ onRender: function(date) { return ev.date.valueOf() < date-start-display.valueOf() ? ' disabled' : ''; } }); ```
Format as component.
```html <div class="input-append date" id="datetimepicker" data-date="12-02-2012" data-date-format="dd-mm-yyyy"> <input class="span2" size="16" type="text" value="12-02-2012"> ```
Format as component with reset button to clear the input field.
```html <div class="input-append date" id="datetimepicker" data-date="12-02-2012" data-date-format="dd-mm-yyyy"> <input class="span2" size="16" type="text" value="12-02-2012"> ```
Initializes an datetimepicker.
Arguments: None
Remove the datetimepicker. Removes attached events, internal attached objects, and added HTML elements.
$('#datetimepicker').datetimepicker('remove');
Arguments: None
Show the datetimepicker.
```javascript $('#datetimepicker').datetimepicker('show'); ```
Arguments: None
Hide the datetimepicker.
```javascript $('#datetimepicker').datetimepicker('hide'); ```
Arguments:
Update the datetimepicker with the specified date.
```javascript $('#datetimepicker').datetimepicker('update', new Date()); ```
Omit currentDate to update the datetimepicker with the current input value.
```javascript $('#datetimepicker').datetimepicker('update'); ```
Arguments:
Sets a new lower date limit on the datetimepicker.
```javascript $('#datetimepicker').datetimepicker('setStartDate', '2012-01-01'); ```
Omit startDate (or provide an otherwise falsey value) to unset the limit.
```javascript $('#datetimepicker').datetimepicker('setStartDate'); $('#datetimepicker').datetimepicker('setStartDate', null); ```
Arguments:
Sets a new upper date limit on the datetimepicker.
```javascript $('#datetimepicker').datetimepicker('setEndDate', '2012-12-31'); ```
Omit endDate (or provide an otherwise falsey value) to unset the limit.
```javascript $('#datetimepicker').datetimepicker('setEndDate'); $('#datetimepicker').datetimepicker('setEndDate', null); ```
Arguments:
Sets the days of week that should be disabled.
```javascript $('#datetimepicker').datetimepicker('setDaysOfWeekDisabled', [0,6]); ```
Omit daysOfWeekDisabled (or provide an otherwise falsey value) to unset the disabled days.
```javascript $('#datetimepicker').datetimepicker('setDaysOfWeekDisabled'); $('#datetimepicker').datetimepicker('setDaysOfWeekDisabled', null); ```
Datetimepicker class exposes a few events for manipulating the dates.
Fired when the date picker is displayed.
Fired when the date picker is hidden.
Fired when the date is changed.
```javascript $('date-end') .datetimepicker() .on('changeDate', function(ev){ if (ev.date.valueOf() < date-start-display.valueOf()){ .... } }); ```
Fired when the view year is changed from decade view.
Fired when the view month is changed from year view.
Fired when you pick a date before the startDate or after the endDate or when you specify a date via the method setDate or setUTCDate..
The datetimepicker includes some keyboard navigation:
By themselves, left/right will move backward/forward one day, up/down will move back/forward one week.
With the shift key, up/left will move backward one month, down/right will move forward one month.
With the ctrl key, up/left will move backward one year, down/right will move forward oone year.
Shift+ctrl behaves the same as ctrl – that is, it does not change both month and year simultaneously, only the year.
The escape key can be used to hide and re-show the datetimepicker; this is necessary if the user wants to manually edit the value.
When the picker is visible, enter will simply hide it. When the picker is not visible, enter will have normal effects – submitting the current form, etc.
In order to make this plugin easier to set different part of date time, mouse wheel has been used to navigate through different views. Scroll up your mouse wheel to navigate to the decade year view. Scroll down will lead to the minute view.
To enalbe this feature. jQuery Mouse Wheel Plugin must be included before using this feature.
Boolean. Default: false
Whether or not to enable navigating through different view mode using mouse wheel.
Boolean. Default: false
Whether or not to reverse the direction of scrolling. Default is scroll up to the decade view.
Integer. Default: 100
Time delays between the next respond to the wheel command, it controls the speed between switching in different views. Unit is in million seconds.
The recommended value for viewSelect option is 4 when this feature is enable. That means you can easily update any the value in every view. This option value is applied in the demo page.
A simple Demo page is given to show it's simple idea.
The plugin supports i18n for the month and weekday names and the weekStart option. The default is English ('en'); other available translations are avilable in the js/locales/ directory, simply include your desired locale after the plugin. To add more languages, simply add a key to $.fn.datetimepicker.dates, before calling .datetimepicker(). Example:
```javascript $.fn.datetimepicker.dates['en'] = { days: ["Sunday", "Monday", "Tuesday", "Wednesday", "Thursday", "Friday", "Saturday", "Sunday"], daysShort: ["Sun", "Mon", "Tue", "Wed", "Thu", "Fri", "Sat", "Sun"], daysMin: ["Su", "Mo", "Tu", "We", "Th", "Fr", "Sa", "Su"], months: ["January", "February", "March", "April", "May", "June", "July", "August", "September", "October", "November", "December"], monthsShort: ["Jan", "Feb", "Mar", "Apr", "May", "Jun", "Jul", "Aug", "Sep", "Oct", "Nov", "Dec"], today: "Today" }; ```
You can override the default date format in the language configuration with format attribute. Example:
```javascript $.fn.datetimepicker.dates['pt-BR'] = { format: 'dd/mm/yyyy' }; ```
Right-to-left languages may also include rtl: true to make the calendar display appropriately.
If your browser (or those of your users) is displaying characters wrong, chances are the browser is loading the javascript file with a non-unicode encoding. Simply add charset="UTF-8" to your script tag:
```html <script type="text/javascript" src="bootstrap-datetimepicker.de.js" charset="UTF-8"></script> ```
Markdown editing meet Bootstrap.
| Version | Compatibility with Bootstrap |
|---|---|
| Bootstrap Markdown v2.x | only compatible with Bootstrap 3.x |
| Bootstrap Markdown v1.x | only compatible with Bootstrap 2.x |
Demo and documentation on http://toopay.github.com/bootstrap-markdown/
Copyright 2013 Taufan Aditya
Licensed under the Apache License, Version 2.0 (the "License"); you may not use this file except in compliance with the License. You may obtain a copy of the License at > http://www.apache.org/licenses/LICENSE-2.0 > Unless required by applicable law or agreed to in writing, software distributed under the License is distributed on an "AS IS" BASIS, WITHOUT WARRANTIES OR CONDITIONS OF ANY KIND, either express or implied. See the License for the specific language governing permissions and limitations under the License.
   
Turn checkboxes and radio buttons in toggle switches.
http://www.bootstrap-switch.org
Include the dependencies: jQuery, Bootstrap and Bootstrap Switch CSS + Javascript:
``` html [...] <link href="bootstrap.css" rel="stylesheet"> <link href="bootstrap-switch.css" rel="stylesheet"> <script src="jquery.js"></script> <script src="bootstrap-switch.js"></script> [...] ```
Add your checkbox:
```html <input type="checkbox" name="my-checkbox" checked>=""> ```
Initialize Bootstrap Switch on it:
```javascript $("[name='my-checkbox']").bootstrapSwitch(); ```
Enjoy.
If you want to use your bootstrap variables, include bootstrap-switch.less in your compilation stack. You can even choose among Bootstrap versions 2.3.2 or 3.*.* compatible source.
A custom directive is available here
IE8+ and all the other modern browsers (until proven otherwise: submit a issue and let's see what we can do).
Licensed under the Apache License, Version 2.0 http://www.apache.org/licenses/LICENSE-2.0
A simple timepicker component for Twitter Bootstrap.
View demos & documentation.
If you make money using this timepicker, please consider supporting its development.
``` bash npm install ```
``` bash $ bower install ```
``` bash $ grunt test // run jshint and jasmine tests $ grunt watch // run jsHint and Jasmine tests whenever a file is changed $ grunt compile // minify the js and css files $ grunt gh-pages // push updates to gh-pages $ grunt bump:[patch/minor/major] // bump the version ```
Thanks to everyone who have given feedback and submitted pull requests. A list of all the contributors can be found here.
Special thanks to and his Twitter Datepicker for inspiration.
This Twitter Bootstrap plugin builds a wizard using a formatted tabbable structure. It allows to build a wizard functionality using buttons to go through the different wizard steps and using events allows to hook into each step individually.
```javascript //basic wizard .ready(function() { $('#rootwizard').bootstrapWizard(); }); ```
```javascript //wizard with options and events .ready(function() { $('#rootwizard').bootstrapWizard({ tabClass: 'nav nav-pills', onNext: function(tab, navigation, index) { alert('next'); } }); }); ```
```javascript //calling a method $('#rootwizard').bootstrapWizard('show',3); ```
Key
Default
Description </thead> <tbody>
tabClass
'nav nav-pills'
ul navigation class
nextSelector
'.wizard li.next'
next element selector
previousSelector
'.wizard li.previous'
previous element selector
firstSelector
'.wizard li.first'
first element selector
lastSelector
'.wizard li.last'
last element selector </tbody>
Key
Description </thead> <tbody>
onInit
Fired when plugin is initialized
onShow
Fired when plugin data is shown
onNext
Fired when next button is clicked (return false to disable moving to the next step)
onPrevious
Fired when previous button is clicked (return false to disable moving to the previous step)
onFirst
Fired when first button is clicked (return false to disable moving to the first step)
onLast
Fired when last button is clicked (return false to disable moving to the last step)
onTabChange
Fired when a tab is changed (return false to disable moving to that tab and showing its contents)
onTabClick
Fired when a tab is clicked (return false to disable moving to that tab and showing its contents)
onTabShow
Fired when a tab content is shown (return false to disable showing that tab content) </tbody>
Key
Parameters
Description </thead> <tbody>
next
Moves to the next tab
previous
Moves to the previous tab
first
Jumps to the first tab
last
Jumps to the last tab
show
zero based index
Jumps to the specified tab
currentIndex
Returns the zero based index number for the current tab
navigationLength
Returns the number of tabs
enable
zero based index
Enables a tab, allows a user to click it (removes .disabled if the item has that class)
disable
zero based index
Disables a tab, disallows a user to click it (adds .disabled to the li element)
display
zero based index
Displays the li element if it was previously hidden
hide
zero based index
Hides the li element (will not remove it from the DOM)
remove
zero based index, optinal bool remove tab-pane element or not false by default
Removes the li element from the DOM if second argument is true will also remove the tab-pane element </tbody>
© Vadim Vincent Gabriel Follow 2012
The MIT License (MIT)
Copyright (c) 2013 - Vincent Gabriel & Jason Gill
Permission is hereby granted, free of charge, to any person obtaining a copy of this software and associated documentation files (the "Software"), to deal in the Software without restriction, including without limitation the rights to use, copy, modify, merge, publish, distribute, sublicense, and/or sell copies of the Software, and to permit persons to whom the Software is furnished to do so, subject to the following conditions:
The above copyright notice and this permission notice shall be included in all copies or substantial portions of the Software.
THE SOFTWARE IS PROVIDED "AS IS", WITHOUT WARRANTY OF ANY KIND, EXPRESS OR IMPLIED, INCLUDING BUT NOT LIMITED TO THE WARRANTIES OF MERCHANTABILITY, FITNESS FOR A PARTICULAR PURPOSE AND NONINFRINGEMENT. IN NO EVENT SHALL THE AUTHORS OR COPYRIGHT HOLDERS BE LIABLE FOR ANY CLAIM, DAMAGES OR OTHER LIABILITY, WHETHER IN AN ACTION OF CONTRACT, TORT OR OTHERWISE, ARISING FROM, OUT OF OR IN CONNECTION WITH THE SOFTWARE OR THE USE OR OTHER DEALINGS IN THE SOFTWARE.
This plugin brings Spell Check As You Type (SCAYT) into CKEditor.
SCAYT is a "installation-less", using the web-services of WebSpellChecker.net. It's an out of the box solution.
config.extraPlugins = 'scayt';
That's all. SCAYT will appear on the editor toolbar and will be ready to use.
Licensed under the terms of any of the following licenses at your choice: GPL, LGPL and MPL.
See LICENSE.md for more information.
Developed in cooperation with WebSpellChecker.net.
This plugin brings Web Spell Checker (WSC) into CKEditor.
WSC is "installation-less", using the web-services of WebSpellChecker.net. It's an out of the box solution.
config.extraPlugins = 'wsc';
That's all. WSC will appear on the editor toolbar and will be ready to use.
Licensed under the terms of any of the following licenses at your choice: GPL, LGPL and MPL.
See LICENSE.md for more information.
Developed in cooperation with WebSpellChecker.net.
Copyright (c) 2003-2013, CKSource - Frederico Knabben. All rights reserved. http://ckeditor.com - See LICENSE.md for license information.
CKEditor is a text editor to be used inside web pages. It's not a replacement for desktop text editors like Word or OpenOffice, but a component to be used as part of web applications and websites.
The full editor documentation is available online at the following address: http://docs.ckeditor.com
Installing CKEditor is an easy task. Just follow these simple steps:
Note: CKEditor is by default installed in the ckeditor folder. You can place the files in whichever you want though.
The editor comes with a few sample pages that can be used to verify that installation proceeded properly. Take a look at the samples directory.
To test your installation, just call the following page at your website:
http://<your site>/<CKEditor installation path>/samples/index.html
For example:
http://www.example.com/ckeditor/samples/index.html
Select2 is a jQuery-based replacement for select boxes. It supports searching, remote data sets, and infinite scrolling of results.
To get started, checkout examples and documentation at http://ivaynberg.github.com/select2
You can source Select2 directly from a CDN like JSDliver, download it from this GitHub repo, or use one of the integrations below.
Select2 supports multiple languages by simply including the right language JS file (select2_locale_it.js, select2_locale_nl.js, etc.).
Missing a language? Just copy select2_locale_en.js.template, translate it, and make a pull request back to Select2 here on GitHub.
Have a bug? Please create an issue here on GitHub!
https://github.com/ivaynberg/select2/issues
Have a question? Ask on our mailing list!
https://groups.google.com/d/forum/select2
Copyright 2012 Igor Vaynberg
This software is licensed under the Apache License, Version 2.0 (the "Apache License") or the GNU General Public License version 2 (the "GPL License"). You may choose either license to govern your use of this software only upon the condition that you accept all of the terms of either the Apache License or the GPL License.
You may obtain a copy of the Apache License and the GPL License in the LICENSE file, or at:
http://www.apache.org/licenses/LICENSE-2.0 http://www.gnu.org/licenses/gpl-2.0.html
Unless required by applicable law or agreed to in writing, software distributed under the Apache License or the GPL License is distributed on an "AS IS" BASIS, WITHOUT WARRANTIES OR CONDITIONS OF ANY KIND, either express or implied. See the Apache License and the GPL License for the specific language governing permissions and limitations under the Apache License and the GPL License.
 
Inspired by twitter.com's autocomplete search functionality, typeahead.js is a flexible JavaScript library that provides a strong foundation for building robust typeaheads.
The typeahead.js library consists of 2 components: the suggestion engine, Bloodhound, and the UI view, Typeahead. The suggestion engine is responsible for computing suggestions for a given query. The UI view is responsible for rendering suggestions and handling DOM interactions. Both components can be used separately, but when used together, they can provided a rich typeahead experience.
G<h2>etting Started
How you acquire typeahead.js is up to you.
Preferred method:
$ bower install typeahead.jsOther methods:
Note: both bloodhound.js and typeahead.jquery.js have a dependency on jQuery 1.9+.
D<h2>ocumentation
E<h2>xamples
For some working examples of typeahead.js, visit the examples page.
B<h2>rowser Support
NOTE: typeahead.js is not tested on mobile browers.
For general questions about typeahead.js, tweet at .
For technical questions, you should post a question on Stack Overflow and tag it with typeahead.js.
I<h2>ssues
Discovered a bug? Please create an issue here on GitHub!
https://github.com/twitter/typeahead.js/issues
For transparency and insight into our release cycle, releases will be numbered with the follow format:
<major>.<minor>.<patch>
And constructed with the following guidelines:
For more information on semantic versioning, please visit http://semver.org/.
Tests are written using Jasmine and ran with Karma. To run the test suite with PhantomJS, run $ npm test.
D<h2>evelopers
If you plan on contributing to typeahead.js, be sure to read the contributing guidelines. A good starting place for new contributors are issues labeled with entry-level. Entry-level issues tend to require minor changes and provide developers a chance to get more familiar with typeahead.js before taking on more challenging work.
In order to build and test typeahead.js, you'll need to install its dev dependencies ($ npm install) and have grunt-cli installed ($ npm install -g grunt-cli). Below is an overview of the available Grunt tasks that'll be useful in development.
grunt build – Builds typeahead.js from source.grunt lint – Runs source and test files through JSHint.grunt watch – Rebuilds typeahead.js whenever a source file is modified.grunt server – Serves files from the root of typeahead.js on localhost:8888. Useful for using test/playground.html for debugging/testing.grunt dev – Runs grunt watch and grunt server in parallel.M<h2>aintainers
Copyright 2013 Twitter, Inc.
Licensed under the MIT License
This file exists here only for YiiBooster to be compatible with yii-auth extension which depends on Yiistrap's TbHtml.
See Issue #443 for details.
Yes, this is a nightmare and most possibly this class will be dropped in future.
  
   
This is the master branch, containing work in progress on the next release. Do not think that it's a production ready version which you can safely clone into your project. If you want the latest point release, check out the 4.0.1 release
4.x.x is based on twitter Bootstrap 3.1.1 or later. If you want to use Bootstrap 2.3.2, please check out the latest 3.x.x release
YiiBooster is a widget toolkit for Yii web framework. Its main purpose is to ease building UI in Yii-based web applications utilizing the beauty of Twitter Bootstrap and several other great UI plugins developed over time by the community.
Twitter Bootstrap wrapping is based over the excellent job of Christoffer Niska called Yii-Bootstrap. We at Clevertech included his library into our own Yii project startup library, YiiBoilerplate, and started improving it in order to satisfy some of our customers' project requirements. YiiBooster is an end result of this effort.
Overall, the following is included in YiiBooster:
Four different WYSIWYG editors for you to choose:
And don't be afraid to use Redactor, because Yii community bought an ORM license for it.
If you want, you can clone the github repo and get the full codebase to build the distributive or documentation or just to hack something.
If you just want to use YiiBooster, you need to download the latest distributive archive. After that, consult the YiiBooster documentation website or the INSTALL.md file included in the package.
Check out YiiBooster documentation website.
Long story short: make pull requests from separate branches dedicated for individual features to master. Please see the wiki page about how to contribute to YiiBooster for details.
If you find any bugs, please create an issue at issue tracker for project Github repository.
This work as a whole is licensed under a BSD license. Full text is included in the LICENSE file in the root of codebase.
Well-built beautifully designed web applications. > www.clevertech.biz
Debug panel for Yii 1.1 (ported from Yii 2).
 
This extension is available at packagist.org and can be installed via composer by following command:
composer require --dev zhuravljov/yii2-debug.
If you want to install this extension manually just copy sources to /protected/extensions directory.
To enable toolbar in your application add following lines to config:
```php return array( 'preload' => array( 'debug', ), 'components' => array( 'debug' => array( 'class' => 'vendor.zhuravljov.yii2-debug.Yii2Debug', // composer installation //'class' => 'ext.yii2-debug.Yii2Debug', // manual installation ), 'db' => array( 'enableProfiling' => true, 'enableParamLogging' => true, ), ), ); ```
You can customize debug panel behavior with this options:
enabled - enable/disable debug panel.allowedIPs - list of IPs that are allowed to access debug toolbar. Default `array('127.0.0.1', '::1'). -accessExpression- additional php expression for access evaluation. -logPath- directory storing the debugger data files. This can be specified using a path alias. Default/runtime/debug. -historySize- maximum number of debug data files to keep. If there are more files generated, the oldest ones will be removed. -highlightCode- highlight code. Highlight SQL queries and PHP variables. This parameter can be set for each panel individually. -moduleId - module ID for viewing stored debug logs. Defaultdebug. -showConfig- show brief application configuration page. Defaultfalse. -hiddenConfigOptions- list of unsecure component options to hide (like login, passwords, secret keys). Default is to hideusernameandpasswordofdbcomponent. -internalUrls- use nice routes rules in debug module. -panels` - list of debug panels.Each attached panel can be configured individually, for example:
```php 'debug' => array( 'class' => 'ext.yii2-debug.Yii2Debug', 'panels' => array( 'db' => array( // Disable code highlighting. 'highlightCode' => false, // Disable substitution of placeholders with values in SQL queries. 'insertParamValues' => false, ), ), ), ```
Each panel have callback option filterData. You can define custom function for filtering input data before writing it in to debug log. It's useful when you need to hide something secret or just delete data from logs. Be careful with data structure manipulation. It can lead to log parsing errors.
Example:
```php 'debug' => array( 'class' => 'ext.yii2-debug.Yii2Debug', 'panels' => array( 'db' => array( 'filterData' => function($data){ // Your code here return $data; } ), ), ), ```
To create own debug panel you can extend class Yii2DebugPanel, for example:
```php class MyTestPanel extends Yii2DebugPanel { /**
/**
/**
/**
And attach this panel in config:
```php 'panels' => array( 'test' => array( 'class' => 'path.to.panel.MyTestPanel', // ... ), ), ```
With static method Yii2Debug::dump() you can dump any data and examine it later in debug log.
If you using PHP < 5.4, debug panel can't detect redirects by himself. You can use following code as workaround:
```php 'panels' => array( 'request' => array( 'filterData' => function($data){ if (empty($data['statusCode'])) { if (isset($data['responseHeaders']['Location'])) { $data['statusCode'] = 302; } else { $data['statusCode'] = 200; } } return $data; }, ), ), ```
Such code just set 302 code if Location header is present. Codes like 4xx and 5xx can be detected in debug panel by himself. In PHP 5.4 and higher debug panel uses native php function http_response_code() for detecting http response code, and there is no need to use this workaround.
A simple module to have cron-like jobs in your database. In addition to yii's commands, yii-job can be used to create on-the-fly asynchronous jobs. Different kinds of jobs are supported:
To actually process the jobs you can use the JobCommand, which itself can be triggered by a sytem cron job. A common scenario is system a cron job that is executed once per minute to trigger JobCommand.
Import data/mysql.sql into your database.
In your config add the module:
```php 'modules' => array( 'yii-job' => array( ), ), ```
In your config add the JobManager component:
```php 'components'=>array( 'jobManager' => array( 'class' => 'application.modules.yii-job.components.JobManager', 'jobs' => array( array( 'class' => 'MyJob', //this is your own class that extends application.modules.yii-job.models.Job 'crontab' => '* 3 * * *' ) ) ), ), ```
Optional: add module models import for convenicence
```php 'import'=>array( 'application.modules.yii-job.models.*' ), ```
In your console config import the JobCommand
```php 'commandMap' => array( 'job' => 'application.modules.yii-job.commands.JobCommand' ), ```
If you want to trigger the job processing from the command line you still need a cron job that executes the JobCommand. It should be triggers like this:
``` yiic job ```
This is the index command which will sync your jobs in the config with your database and run all jobs that are due.
Thanks to mtdowling for providing a nice php crontab parser: https://github.com/mtdowling/cron-expression
Download or checkout (SVN/Git) from http://yii-user.2mx.org and unpack files in your protected/modules/user
clone git git@github.com:mishamx/yii-user.git
Change your config main:
return array(
    #...
    // autoloading model and component classes
    'import'=>array(
        'application.models.*',
        'application.components.*',
        'application.modules.user.models.*',
        'application.modules.user.components.*',
    ),

    #...
    'modules'=>array(
        #...
        'user'=>array(
            # encrypting method (php hash function)
            'hash' => 'md5',

            # send activation email
            'sendActivationMail' => true,

            # allow access for non-activated users
            'loginNotActiv' => false,

            # activate user on registration (only sendActivationMail = false)
            'activeAfterRegister' => false,

            # automatically login from registration
            'autoLogin' => true,

            # registration path
            'registrationUrl' => array('/user/registration'),

            # recovery password path
            'recoveryUrl' => array('/user/recovery'),

            # login form path
            'loginUrl' => array('/user/login'),

            # page after login
            'returnUrl' => array('/user/profile'),

            # page after logout
            'returnLogoutUrl' => array('/user/login'),
        ),
        #...
    ),

    #...
    // application components
    'components'=>array(
    #...
        'db'=>array(
        #...
            'tablePrefix' => 'tbl_',
        #...
        ),
        #...
        'user'=>array(
            // enable cookie-based authentication
            'class' => 'WebUser',
            'allowAutoLogin'=>true,
            'loginUrl' => array('/user/login'),
        ),
    #...
    ),
    #...
);
Change your config console:
return array(
    #...
    'modules'=>array(
        #...
        'user'=>array(
            # encrypting method (php hash function)
            'hash' => 'md5',

            # send activation email
            'sendActivationMail' => true,

            # allow access for non-activated users
            'loginNotActiv' => false,

            # activate user on registration (only sendActivationMail = false)
            'activeAfterRegister' => false,

            # automatically login from registration
            'autoLogin' => true,

            # registration path
            'registrationUrl' => array('/user/registration'),

            # recovery password path
            'recoveryUrl' => array('/user/recovery'),

            # login form path
            'loginUrl' => array('/user/login'),

            # page after login
            'returnUrl' => array('/user/profile'),

            # page after logout
            'returnLogoutUrl' => array('/user/login'),
        ),
        #...
    ),
    #...
);
Run command: yiic migrate –migrationPath=user.migrations
Input admin login, email and password
 1.8.1.2
